
The topic I wanted to cover in this post is non-destructive workflow for “developing” photographed or scanned negatives – in this case B&W film. Why even bother about film? Because I still love analog photos as a hobby. 🙂 I wrote some time ago a post about it.
Previously I used to work on my scanned negatives in Photoshop. However, even with specialized scanning software like Silverfast it is quite painful process. Using Photoshop as additional step has many problems:
- Either you are working on huge files or lose lots of quality and resolution on save.
- Even 16 bit output images from the scanning software are low dynamic range.
- 16 bit uncompressed TIFF files output from scanning software are insanely big in size.
- Batch processing is relatively slow and hard to control.
- If you don’t keep your data in huge and slow to load PSD files and adjustment layers, you are going to lose information on save.
- Photoshop is much more complex and powerful tool, not very convenient for a quick photo collection edit. That’s why Adobe created Lightroom. 🙂
No scanner? No problem!
Previously I used a scanner on many of my all time favourite film photos.
At the end of the post (not to make it too long) there are some examples of ones scanned using excellent (for the price and its size) Epson V700. I developed B&W photos myself, color one was developed at a pharmacy lab for ~$2 a roll.
They are one of my favourite photos of all time. All taken using relatively compact Mamiya 6. Such a high quality is possible with medium format film only though – don’t expect such results from a small frame 35mm camera.
However, I foolishly left my scanner in Poland and wasn’t able to use anymore (I’m afraid that such fragile equipment can get broken during shipping without proper packaging). Buying a new one is not super-cheap. Therefore I started to experiment with using a DSLR or camera in general for getting decent looking positive digital representation of negatives. I confirm that it is definitely possible even without buying expensive macro lens – I hope to write a bit more about the reproduction process later when it improves. For now I wanted to describe the non-destructive process I came up with in Lightroom using a small trick with curves.
The Lightroom workflow
Ok, so you take a photo of your negative using some slide copying adapter. You get results looking like this:
 Far from perfect, isn’t it? The fact that it was a TriX 400 roll rated at ASA 1250 and developed using Diafine doesn’t help – it is push developer, quite grainy and not very high detail with specific contrast that cannot be fixed using Adams Zone System and development times. It was also taken using a 35mm rangefinder (cheapest Voigtlander Bessa R3A), so when taking the photo you can’t be sure of proper crop, orientation or sharpness.
But enough excuses – it’s imperfect, but we can try to work around many of those problems in our digital “lightroom”. 🙂
Ok, so let’s go and fix that!
Before starting, I just wanted to make it clear – all I’ll describe is relevant only if you use RAW files and have a camera with dynamic range that is good enough – any DSLR or mirrorless bought within last 5-6 years will be fine.
1. Rough and approximate crop
 The first step I recommend for convenience of even evaluating your film negatives is doing some simple cropping and maybe rotating the shot. It not only helps you judge photo and decide if you want to continue “developing” it (could have been a completely missed shot), but also will help the histogram used for further parts of development.
2. Adjusting white balance and removing saturation and noise reduction
 In the next step I propose to adjust white balance (just use pipette and pick any gray point) and completely remove saturation from your photo if working with black and white. Every film has some color cast (depends on the film and developer – can be purple, brown etc). Also since you (should) take it using small ISO like 100, you can safely remove any extra digital noise reduction that unfortunately is on by default in Lightroom – that’s what I did here as well. Notice that in my example color almost didn’t change at all – the camera was smart enough to auto adjust its WB automatically to the film color.
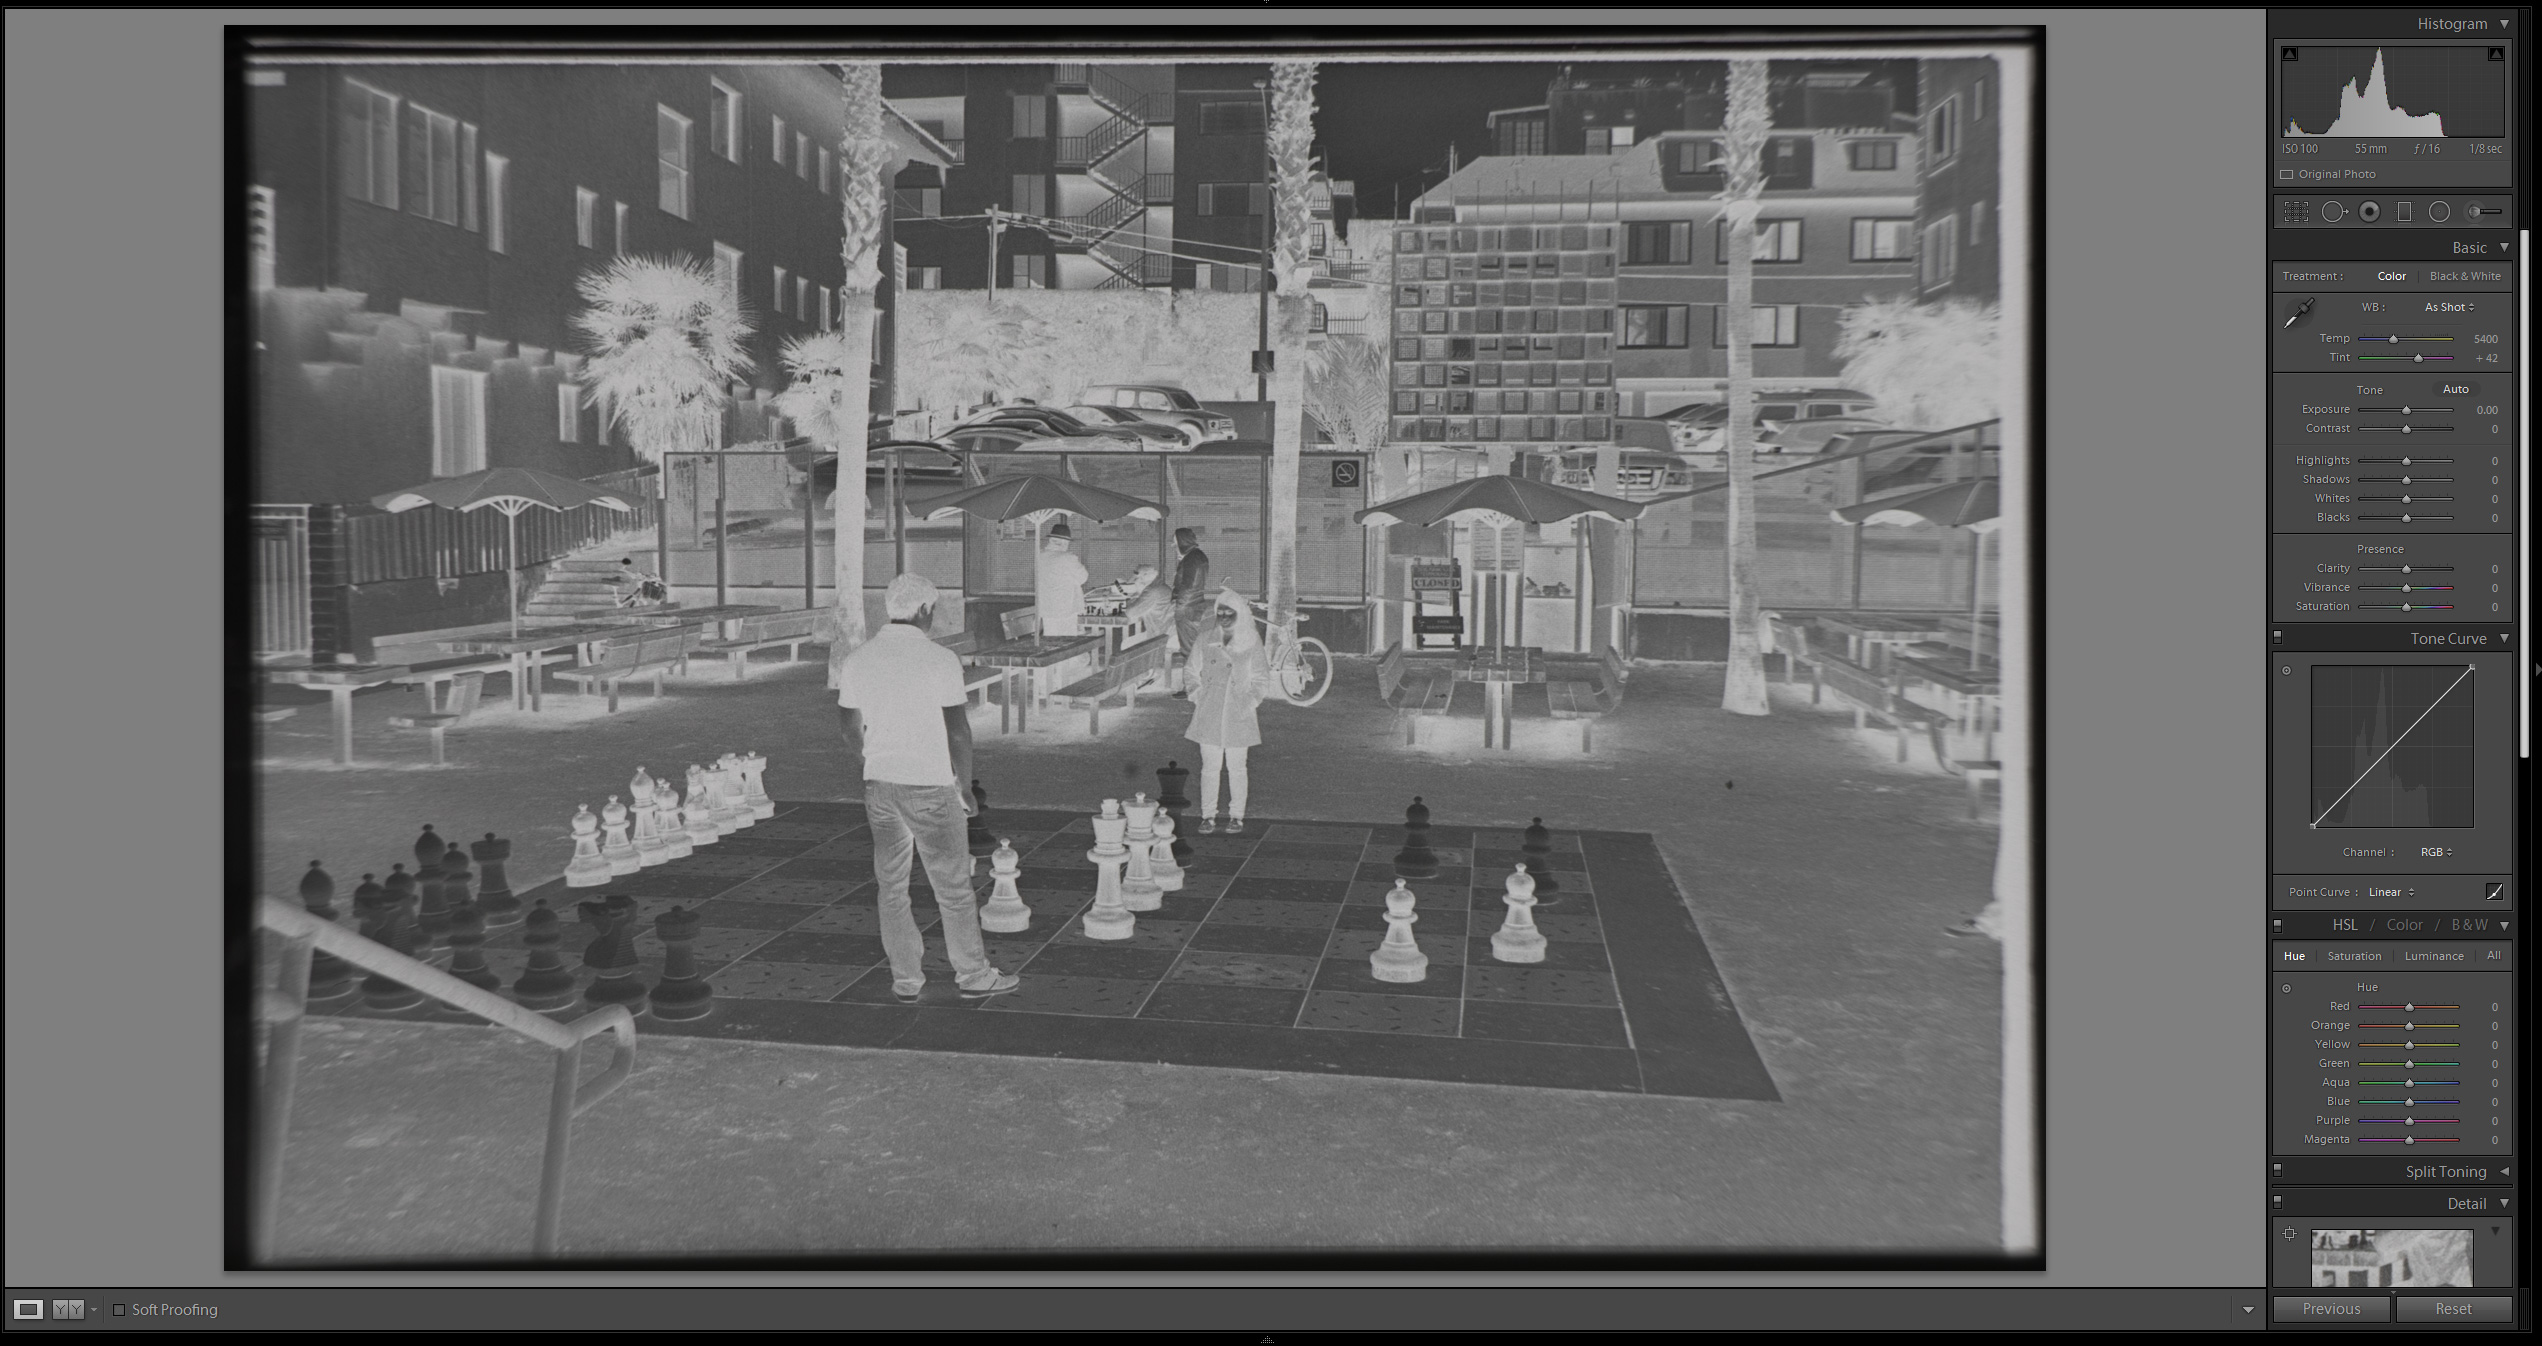
3. Magic! Inverting the negative
 Ok, this is the most tricky part and a feature that Lightroom is lacking – a simple “invert”. In Photoshop it is one of basic menu options, there is even a keyboard shortcut, here you have to… use the curves. Simply grab your white point and turn it to 0, and do the opposite with the black point – put it to 1. Simple (though UI sometimes can get stuck, so adjust those points slowly) and works great! Finally you can see something on this photo. You can also see that this digital “scan” is far from perfect, as the film was not completely flat – blurriness on the edges. 😦 But in the era of desired low-fi and instagram maybe it is an advantage? 😉
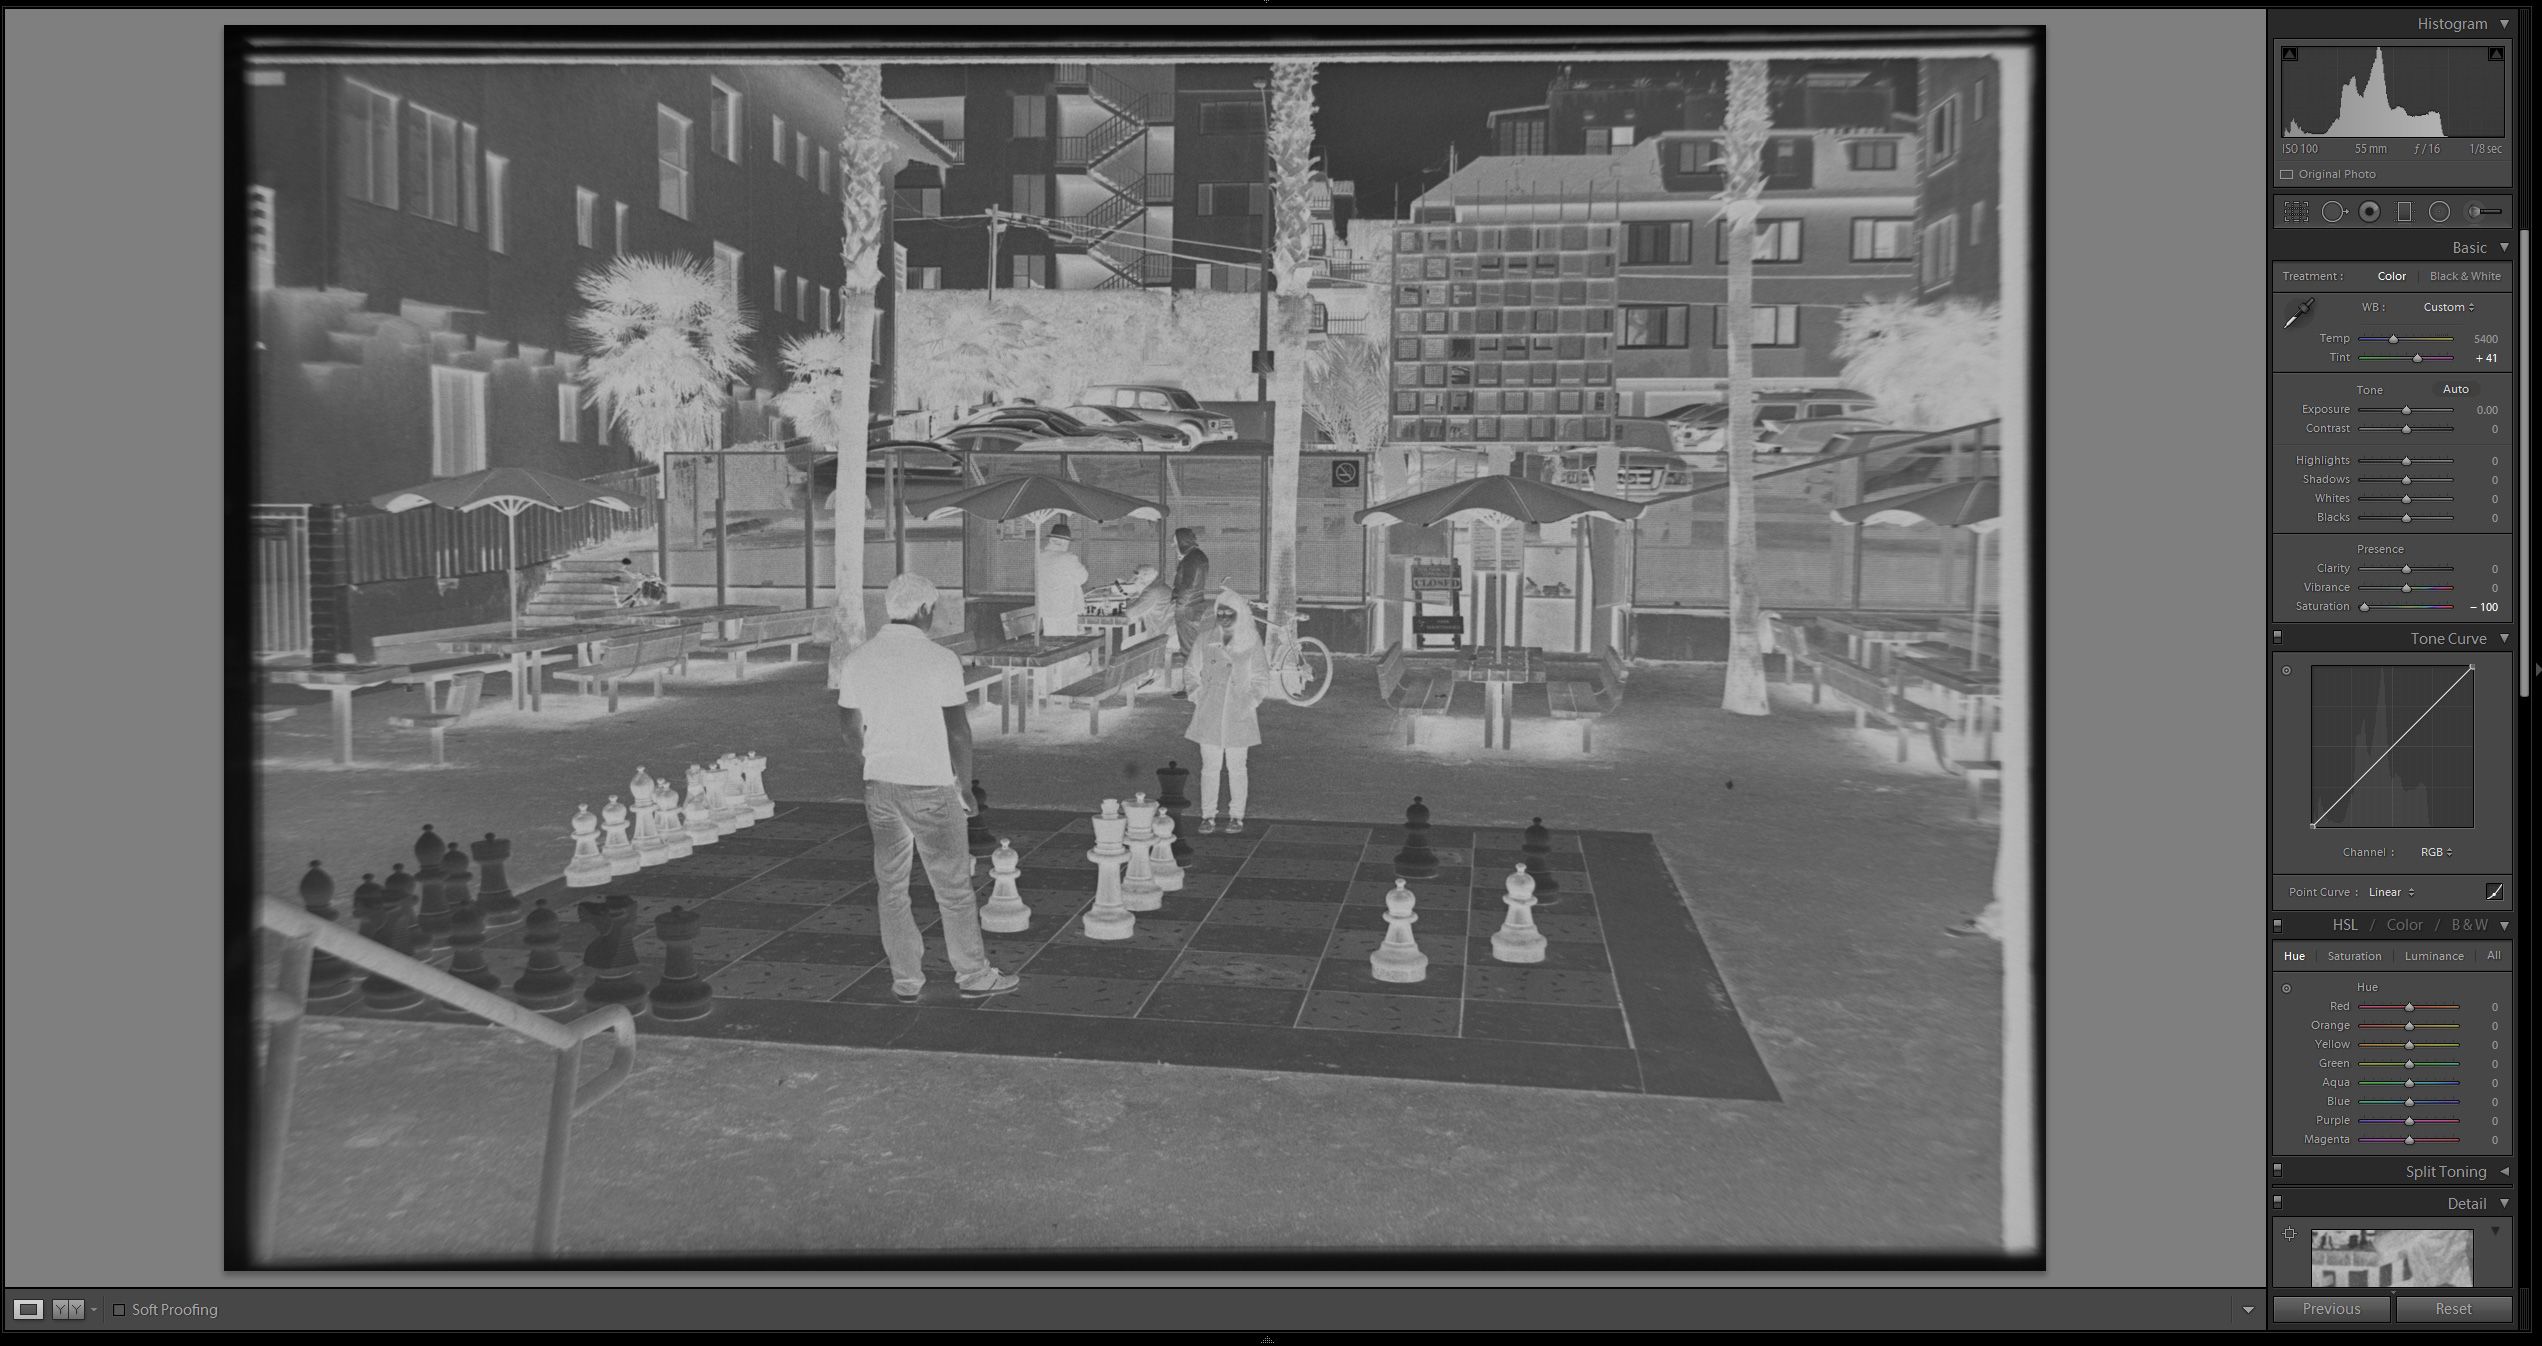
4. (Optional) Pre-adjusting the exposure and contrast
 This step can be optional – depends on the contrast of your developed film. In my case I decided to move them a bit to make it easier later on further operations on the curves – otherwise you might have to do precise sub-pixel changes with the curves which due to UI imprecision can be inconvenient. I also cropped a bit extra to make the histogram even better and not fooled by the fully lit or dark borders.
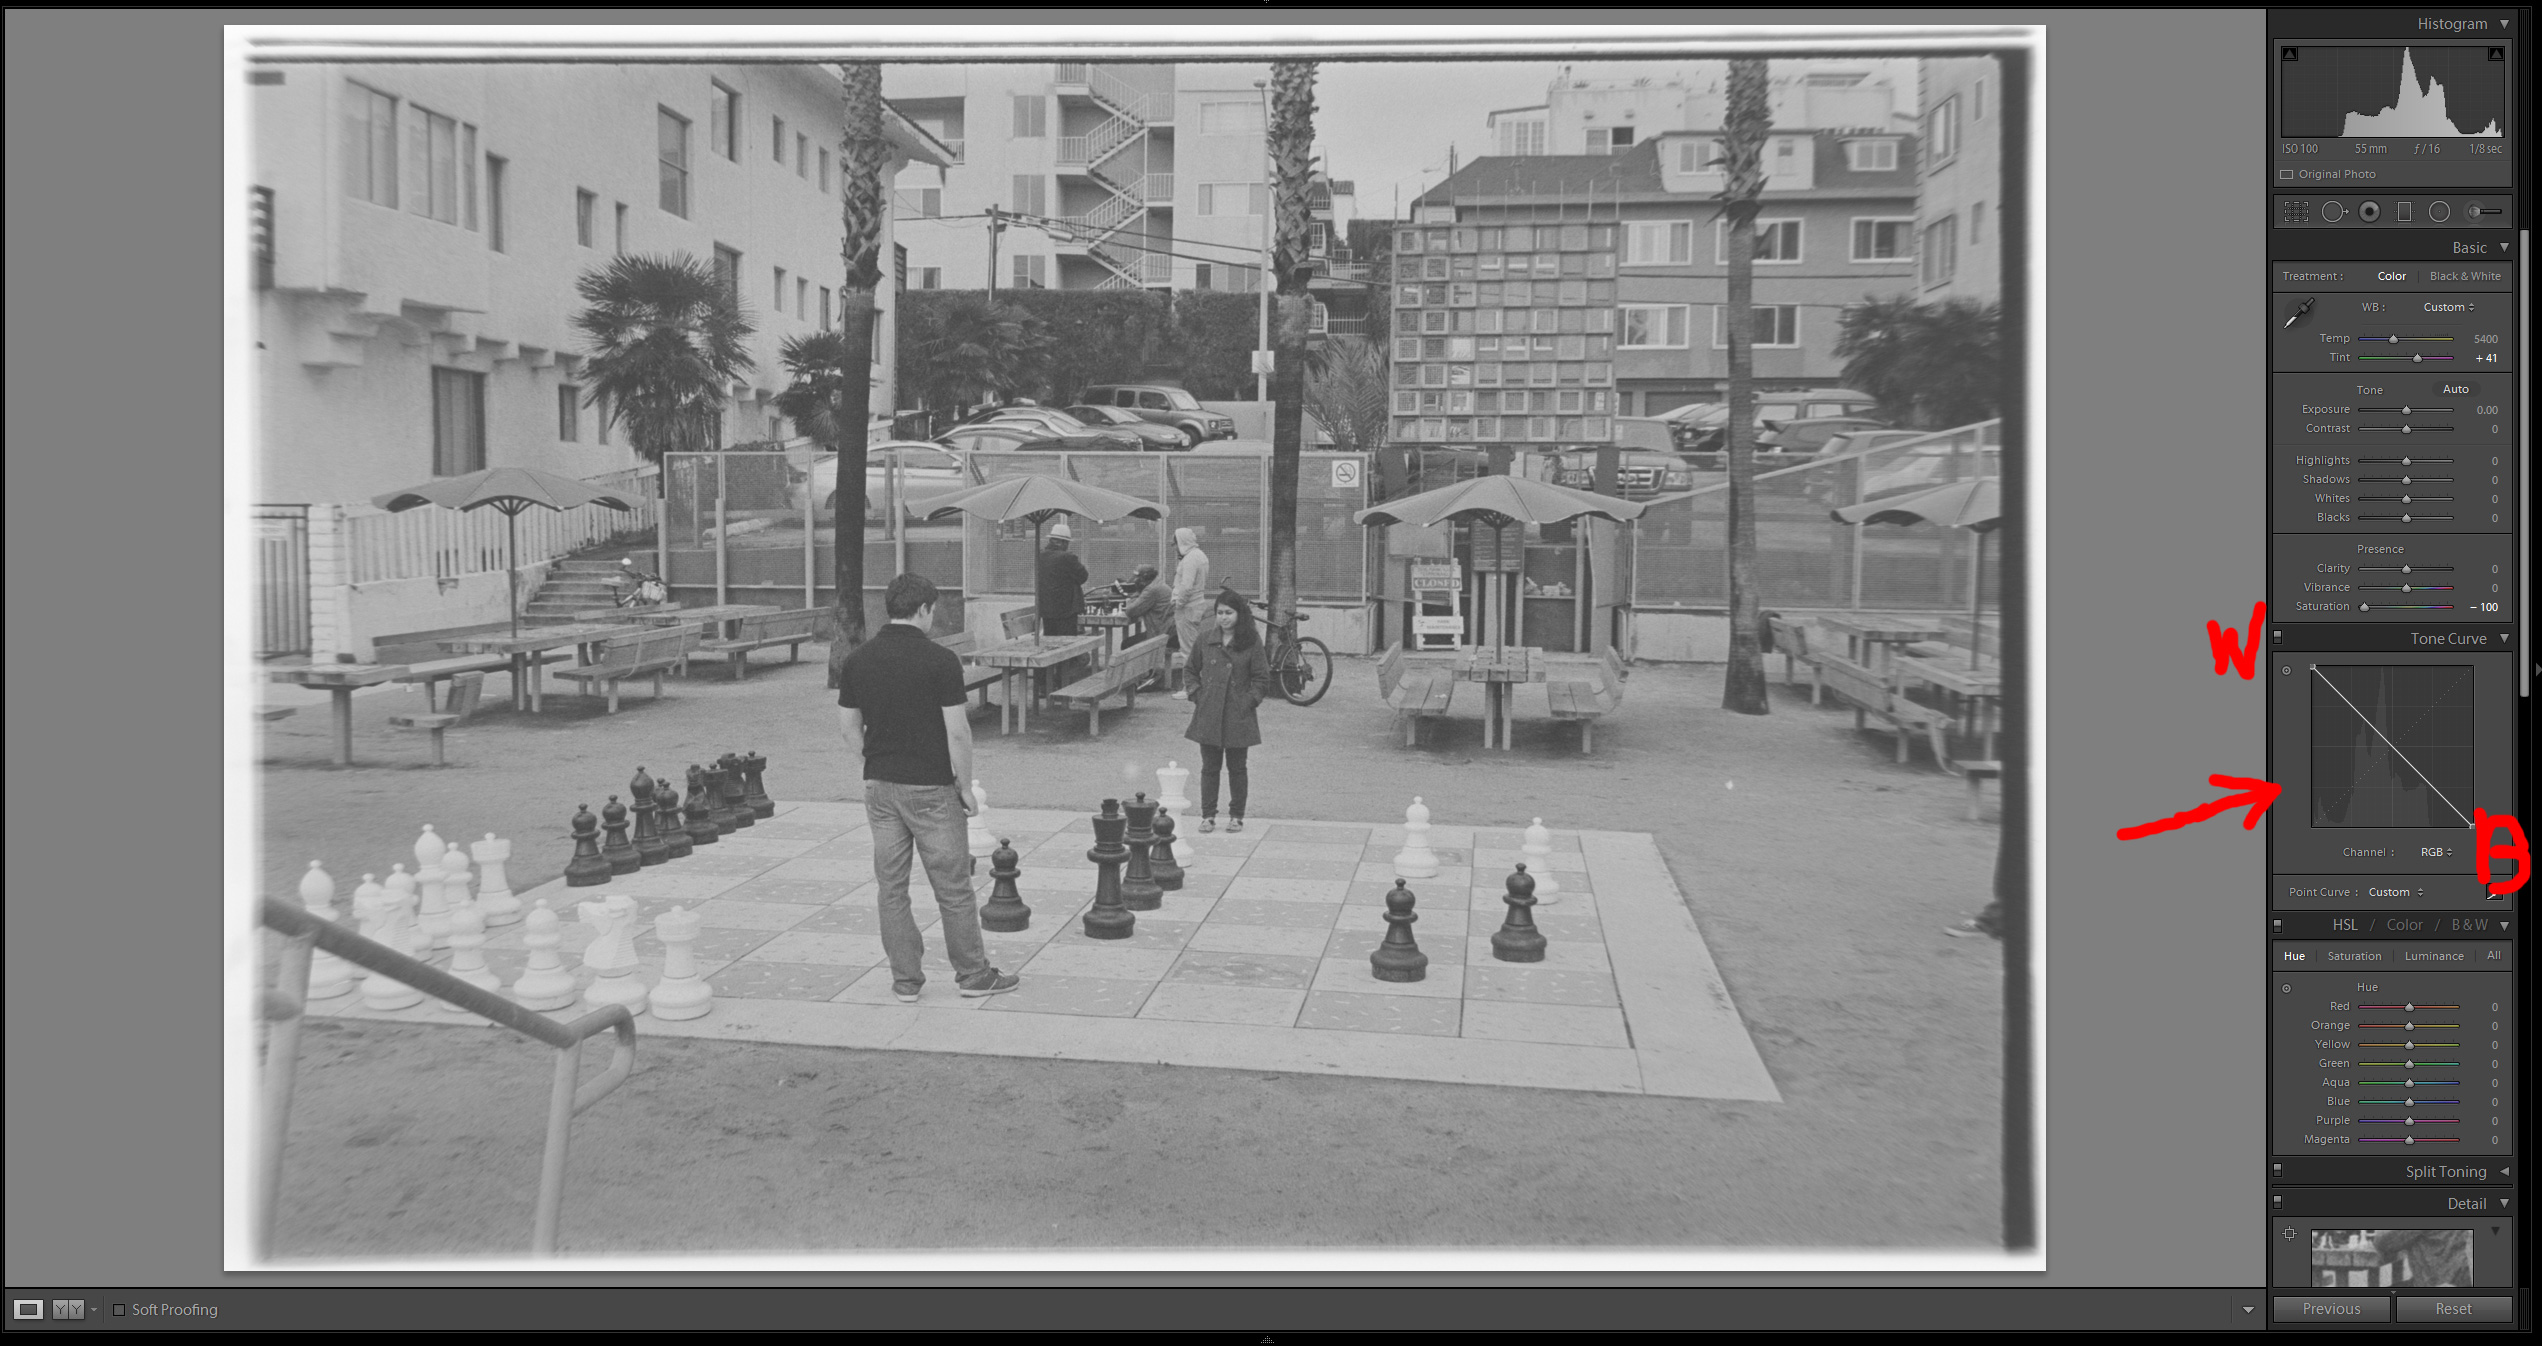
5. Adjusting white point
 Now having the histogram more equalized and useful, you can set your white point using curves. Obviously your histogram is now reversed – this can be confusing at first, but after working on a first scan you can quickly get used to it. The guidelines here are the same like with regular image processing or photography – tweak your slider looking for the points of your scene you want to be white (with B&W one can be more radical on this step) using the histogram as a helper.
Why I’m not using Lightroom “general” controls like blacks, whites etc.? Because their behavior is reversed and very confusing. They also do some extra magic and have non-linear response, so it’s easier to work with curves. Though if you can find optimal workflow using those controls – let me know in comments!
6. Adjusting the black point
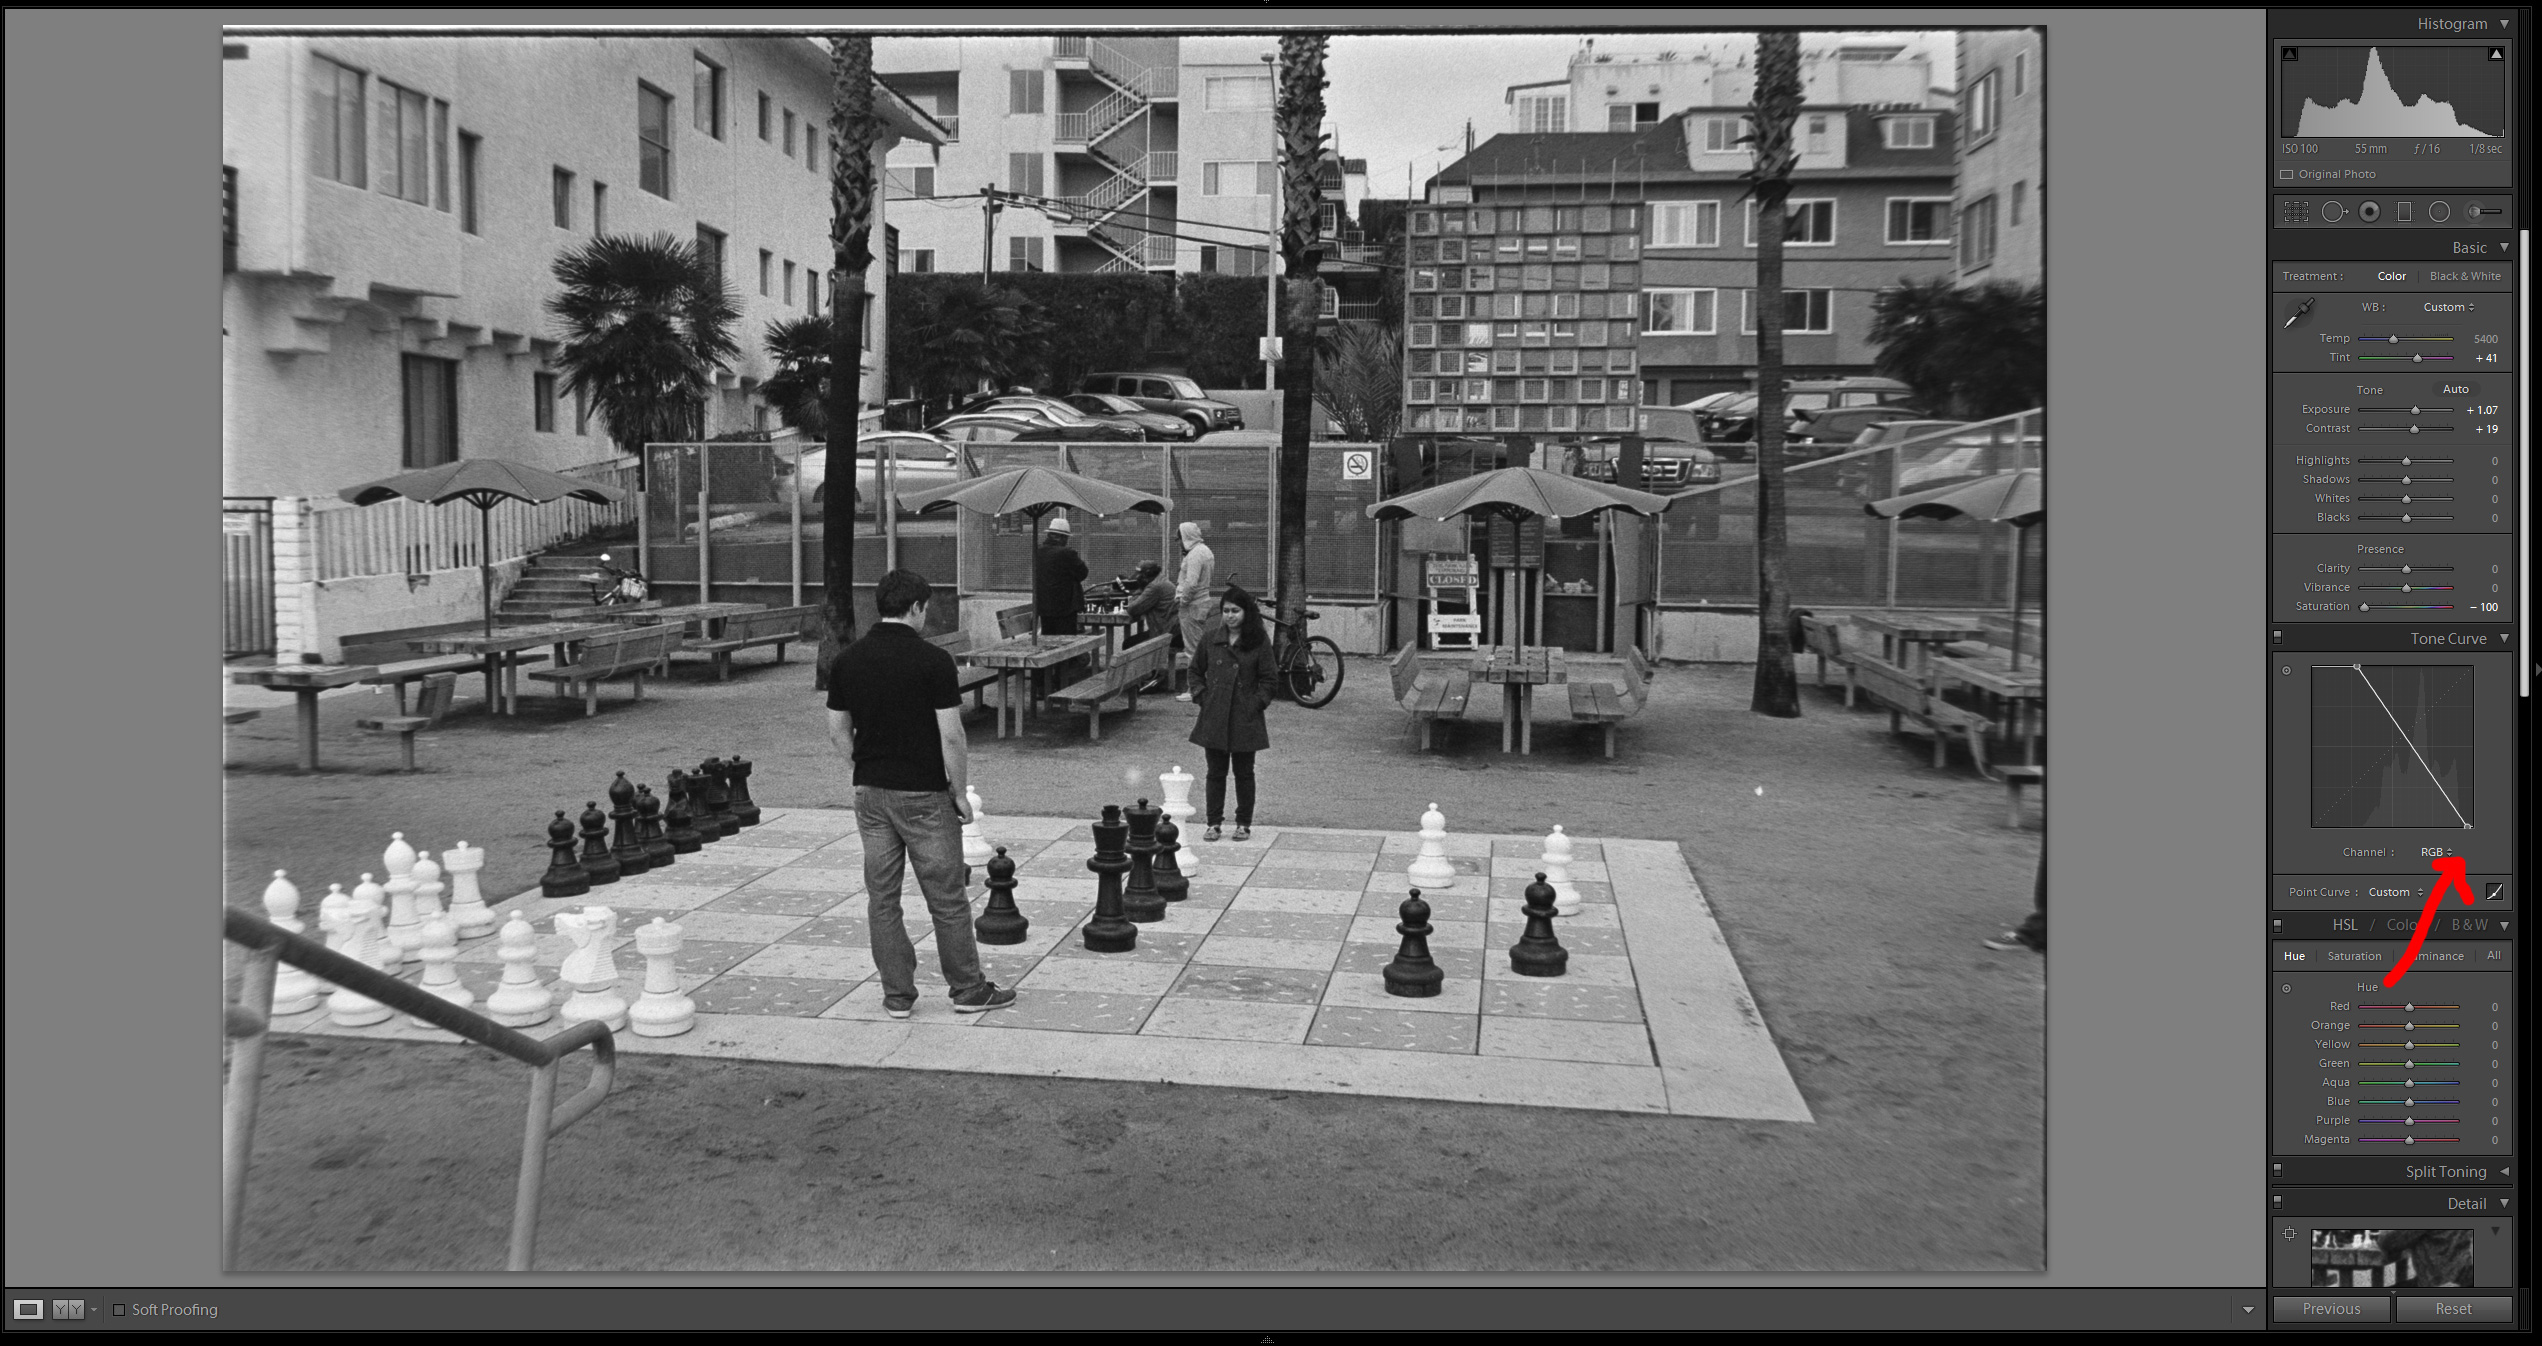 Next step is simple and similar – you proceed in the same way to find your black point and darkest parts of your photo.
At this point your photo may look too contrasty, too dark or too bright – but don’t worry, we are going to fix it in the next step. Also since all editing in Lightroom is non-destructive, it is going to have still the same quality.
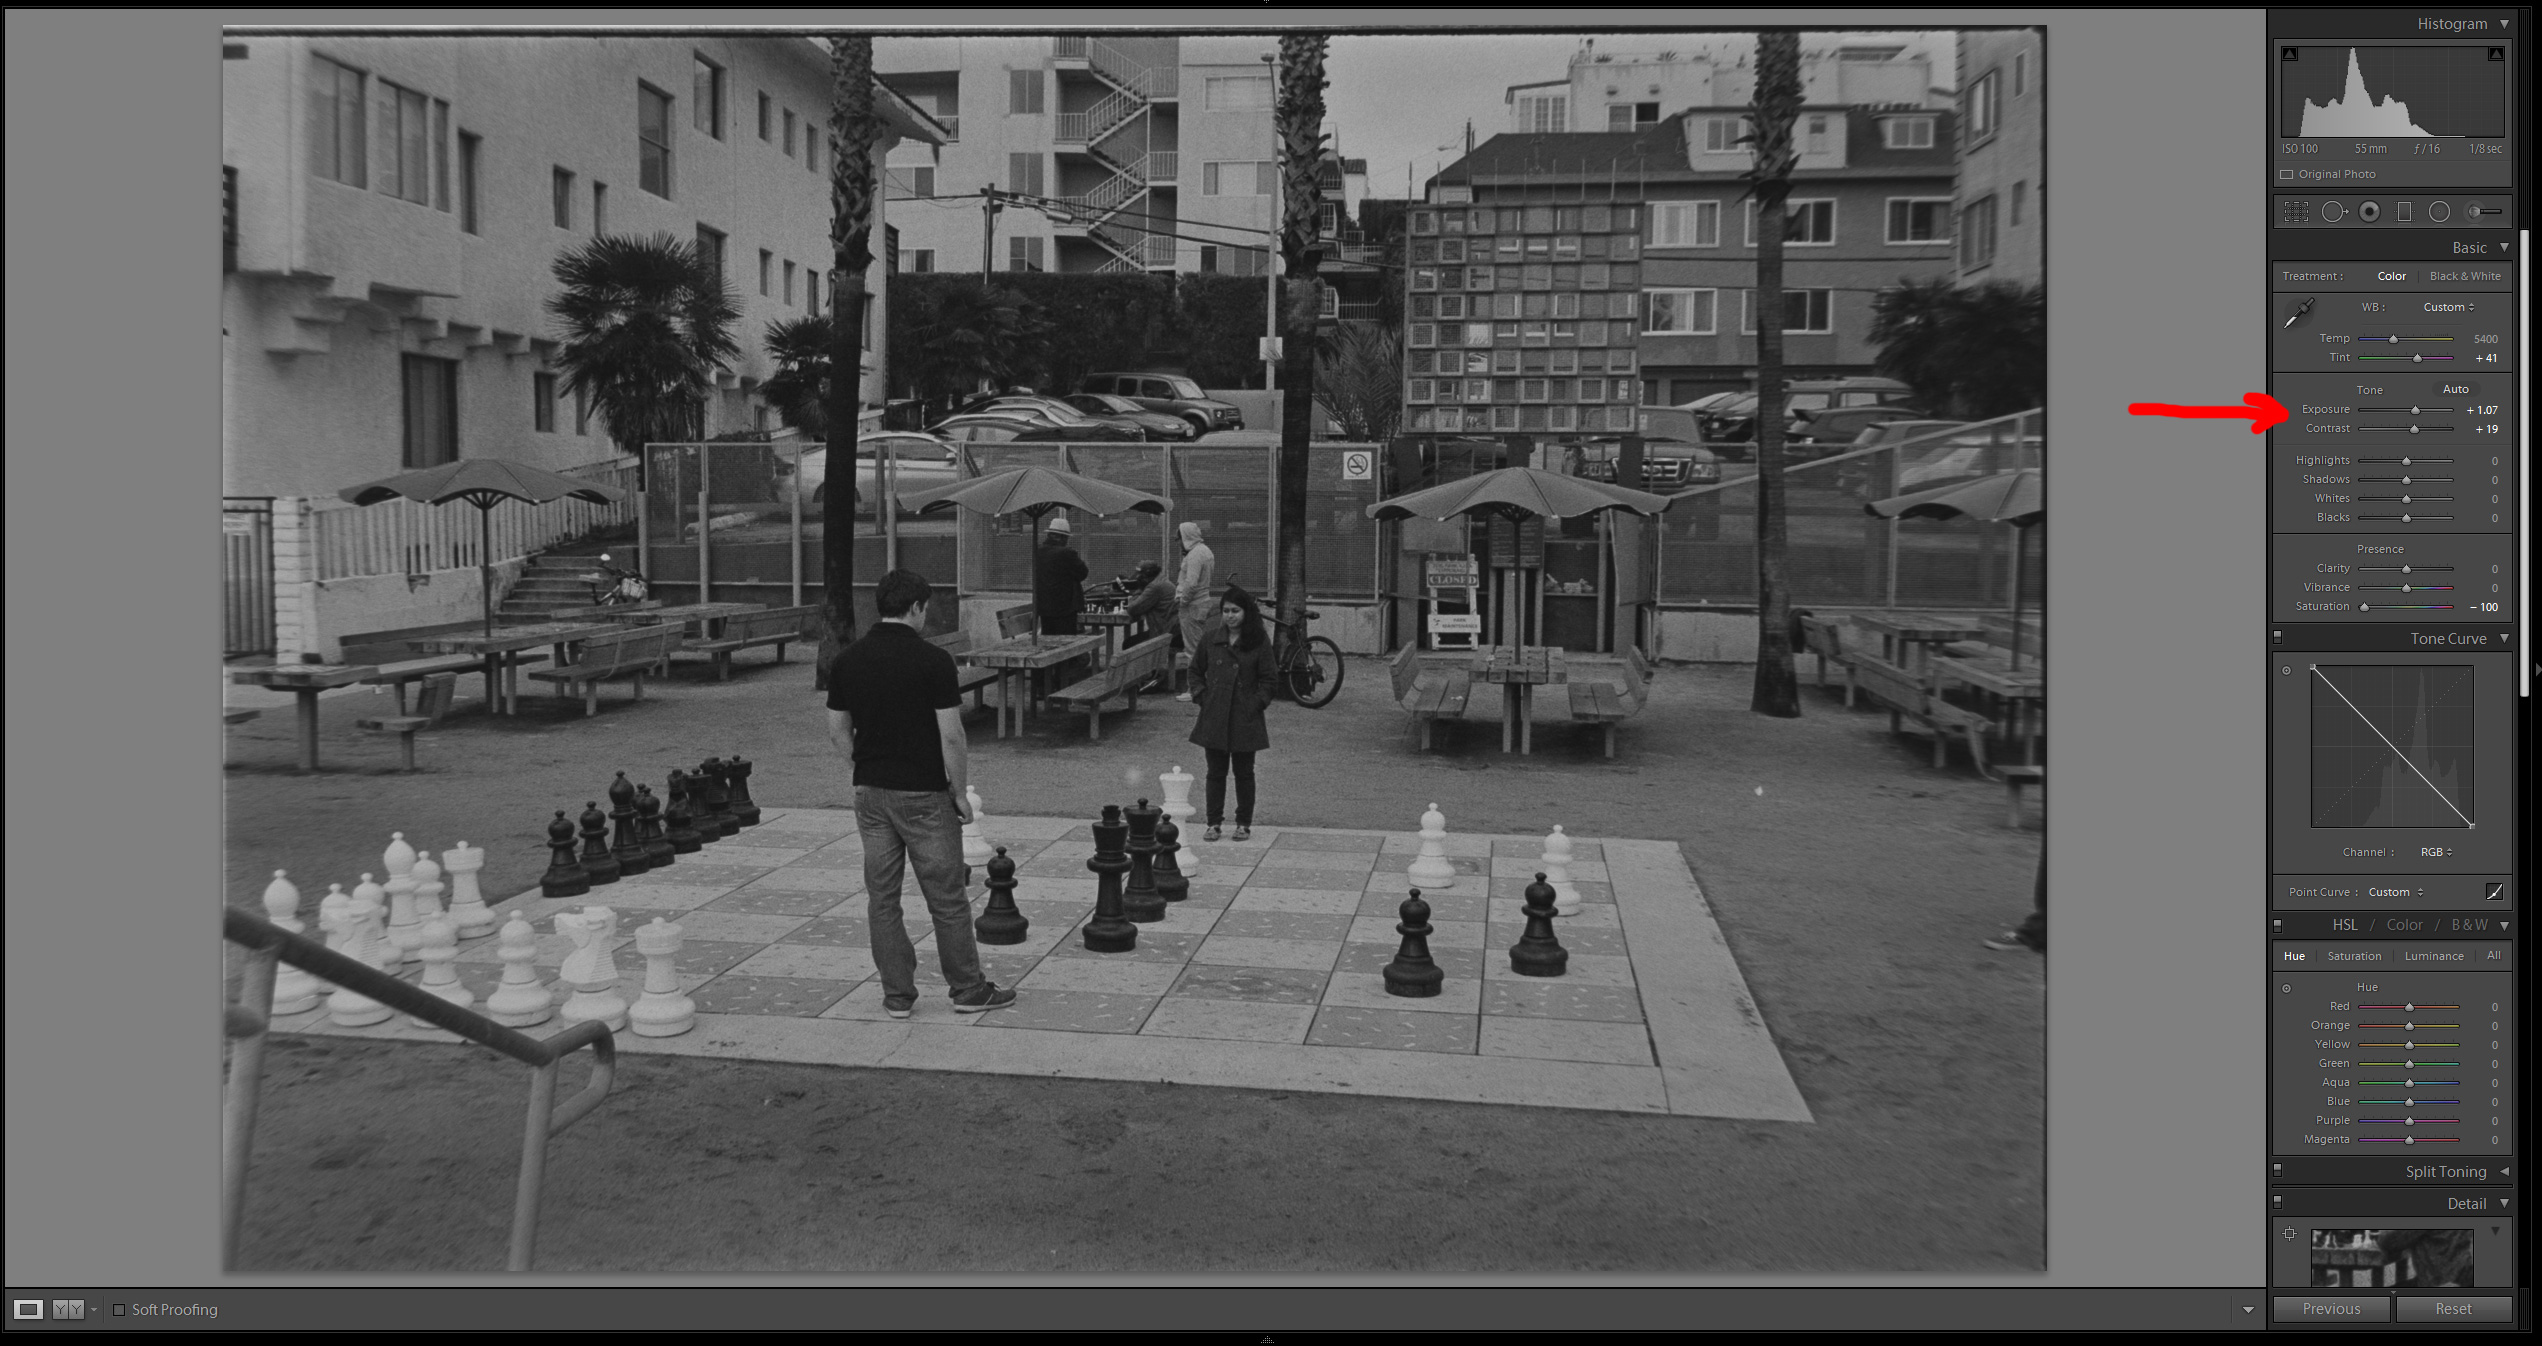
7. Adjusting gamma curve / general brightness
 In this step you add another control point to your curve and by dragging it, create smooth, gamma response. In this step look mainly at your midtones – medium grays – and general ambiance of the photo.
You can make your photo brighter or darker – it all depends. In this case I wanted slightly brighter one.
It can start to lack extra “punch” and the response can become too flat – we will fix it in the next point.
8. Adding extra contrast in specific tonal parts
 By adding extra point and “toe” to your curve, you can boost the contrast in specific parts. I wanted this photo to be aggressive (I like how black and white chest pieces work well in B&W), so I added quite intensive one – now looking at it I think I might have over done it, but this whole post is instructional.
Fun-fact for photographers who are not working in the games industry or are not technical artists or graphics programmers – such S-shaped curve is often called in games an “filmic tonemapping” curve, from analog photo or movie film/tape.
9. Final crop and rotation
 I probably should have done it earlier, but I added extra cropping and straightened the photo. I added some extra sharpening / unsharp mask to compensate for not perfectly sharp both original photo and the scan of the film.
10. Results after saving to the hard drive
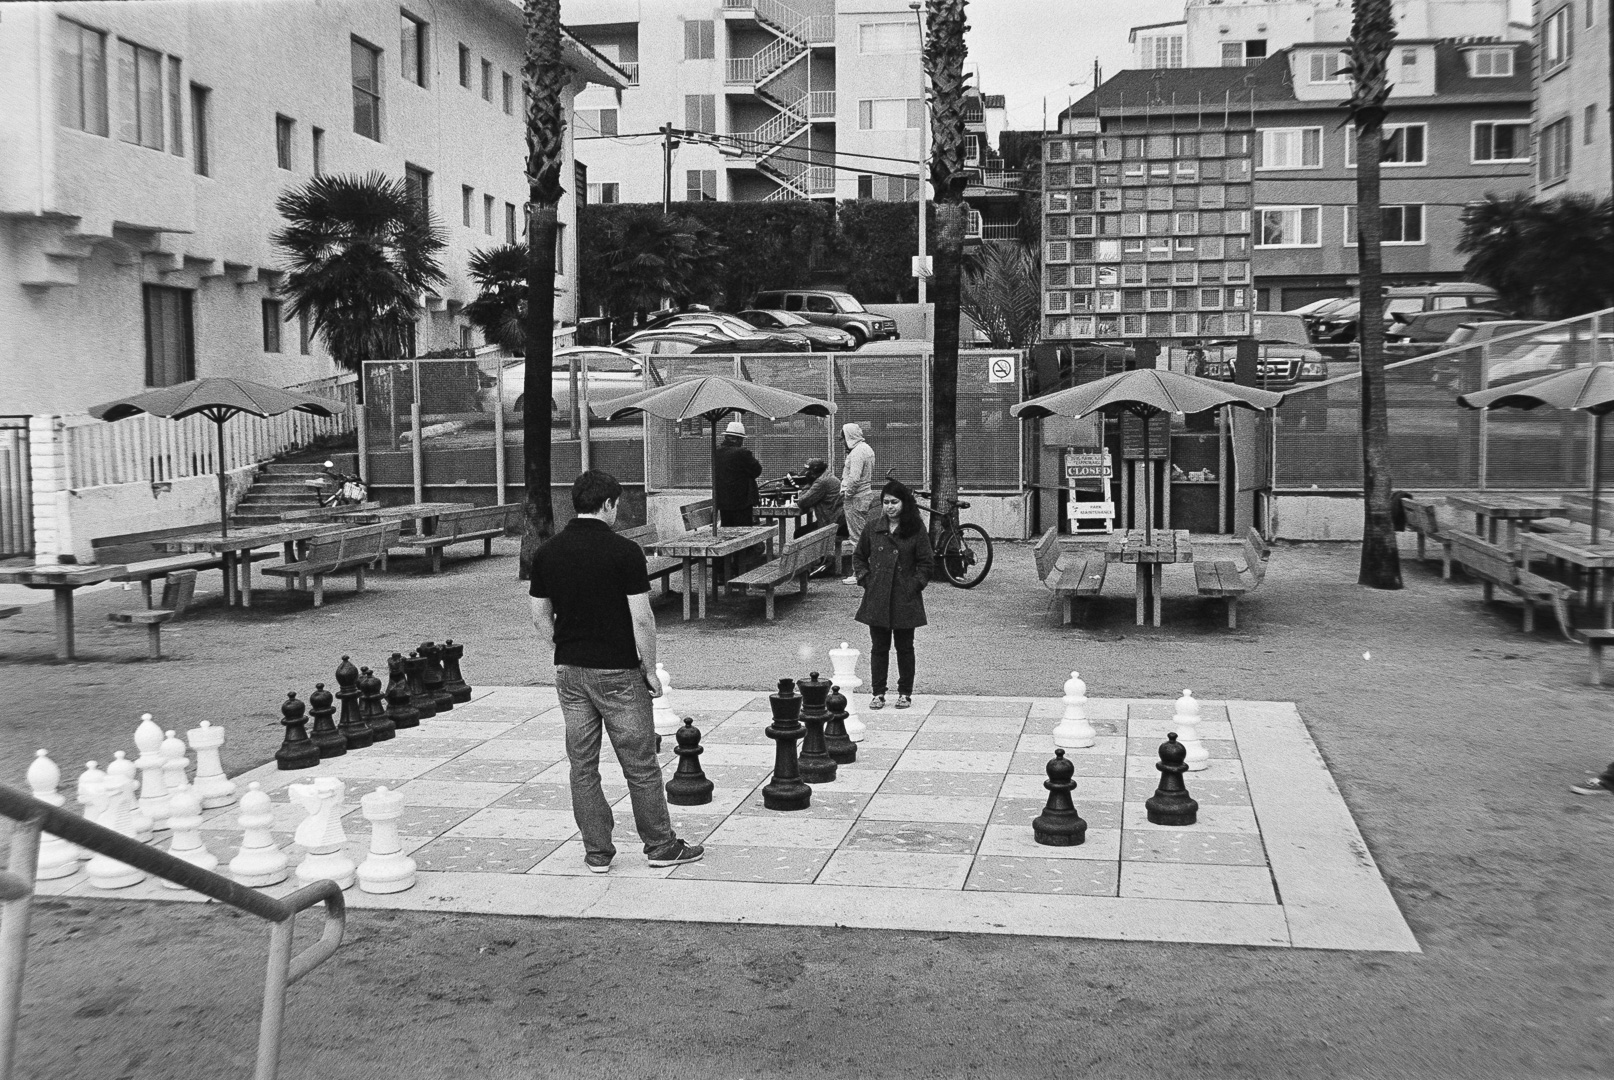 This is how it looks after a resizing save from Lightroom to disk – not too bad comparing to the starting point, right?
The best advantage of Lightroom – you can extremely easy copy those non-destructive settings (or even create a preset!) and apply it to other photos on your scan! I spent on those 2 extra shots no longer than 3 minutes each. 🙂 Very convenient and easily controllable batch processing.

Conclusions
I hope I have shown that non-destructive workflow of processing scans of negatives in Lightroom can be fast, easy, productive and you can batch-process many photos. This is amazing tool and I’m sure other better photographers will get even better results!
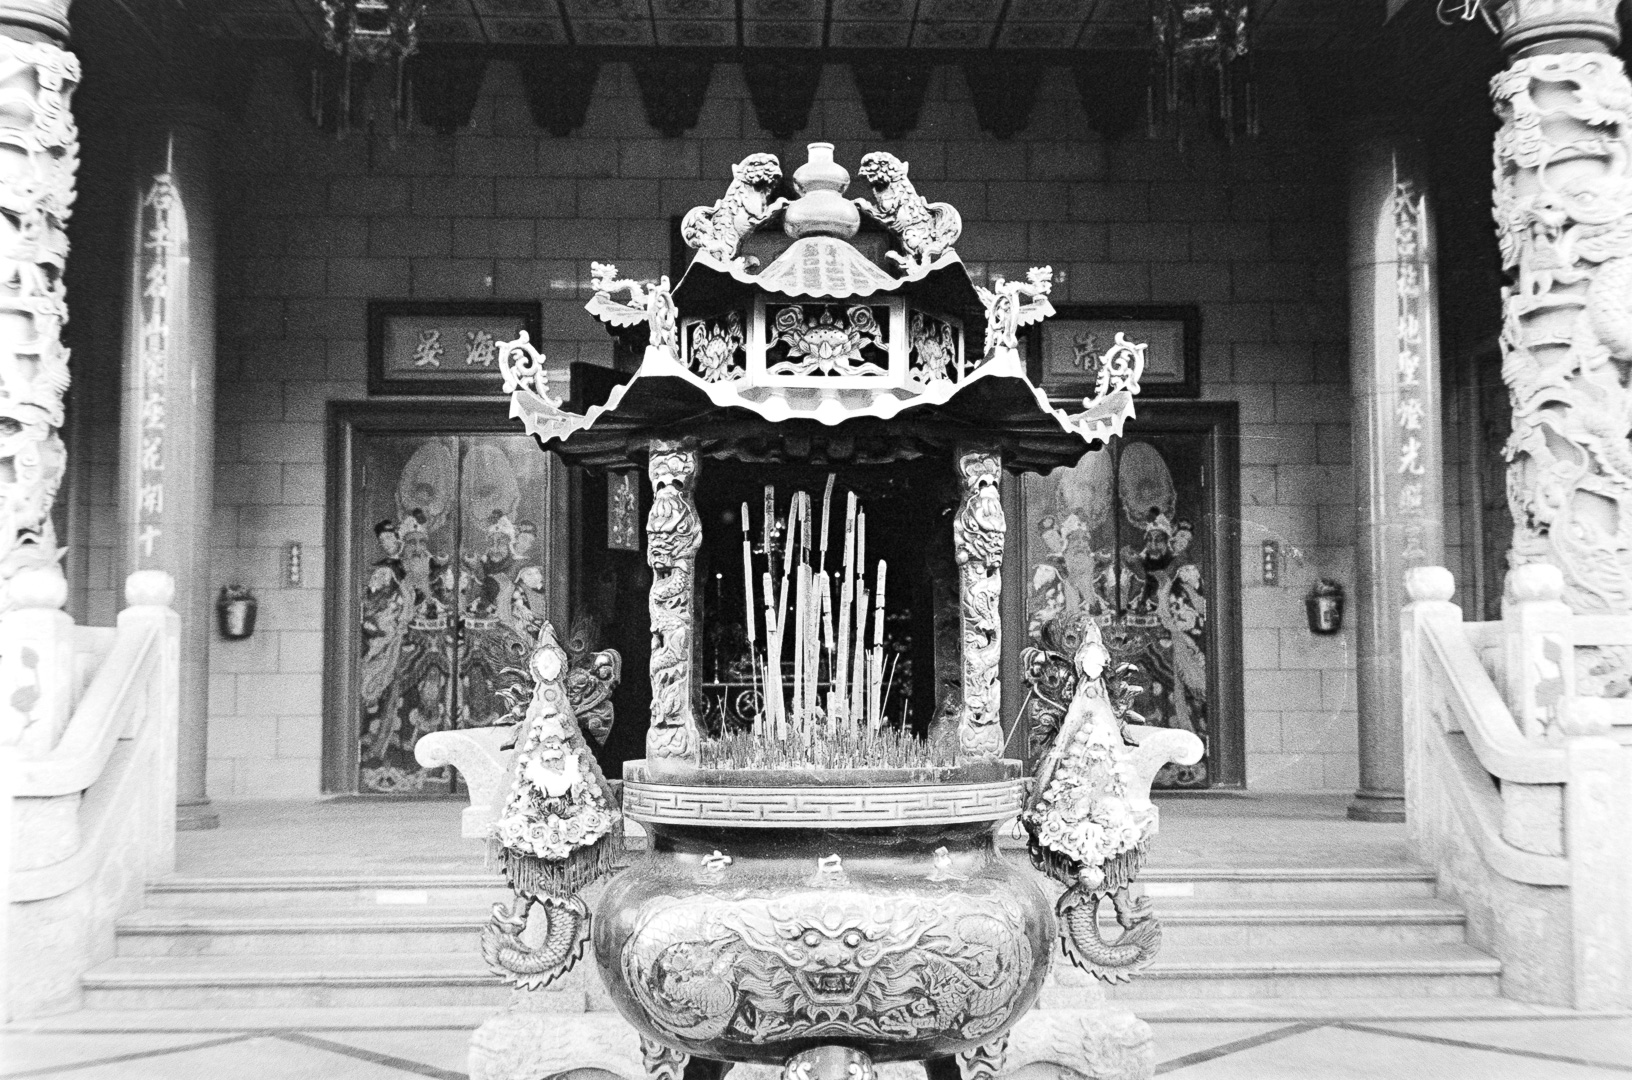
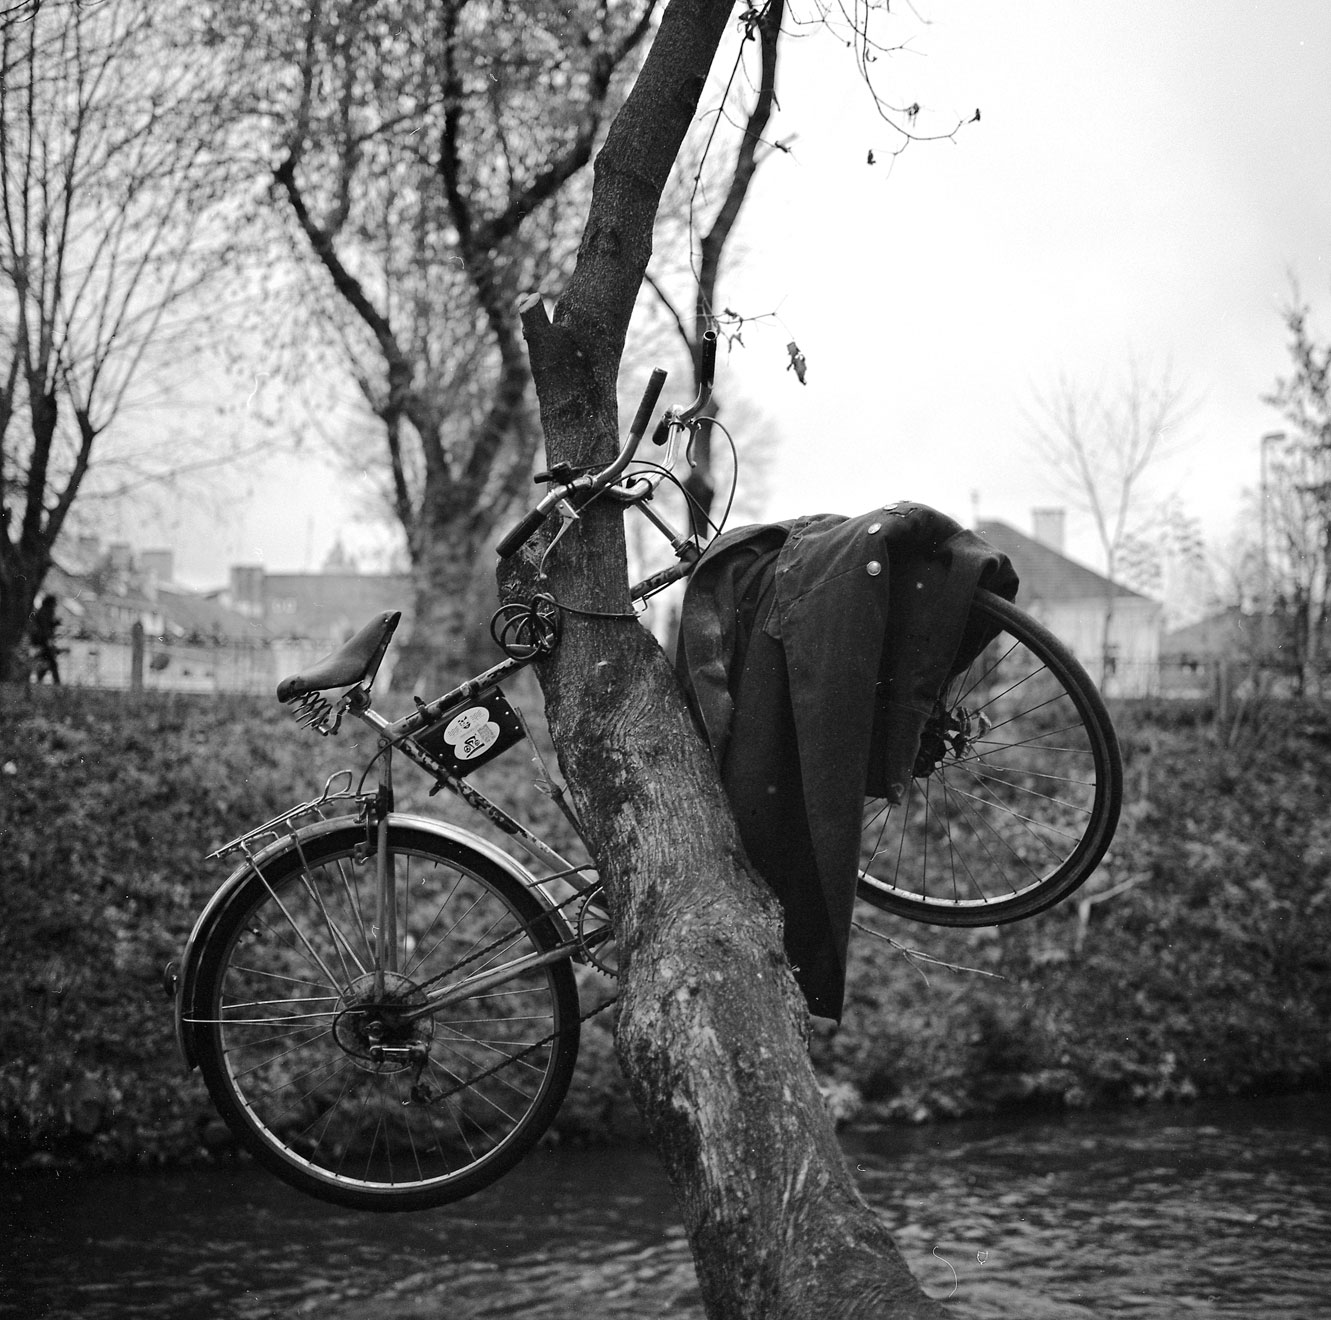
And I promise to write more about my scanning rig assembled for around $100 (assuming you already have a camera) and post some more scans from better quality, lower ASA films or medium format shots.
Bonus
As I promised, some photos that I took couple years ago using Mamiya 6. All scanned and processed manually (color one developed at cheap pharmacy photo lab). Medium format 6×6 composition – another reason to start using film. 🙂


would it be worth just inverting the negatives, exporting to .tiff and then working with them already being inverted (so the controls are normal)
I have tried that before coming up with this whole workflow and unfortunately ended up with either clipping (when maximizing histogram prior to ACR “development” to LDR) or banding (when no equalizing of histogram). Unfortunately the way ACR renders 16 bit files and Photoshop processes them is just terrible, it’s nothing like real floating point / HDR files. 😦 At least this was my experience and haven’t found any way to make Photoshop behave properly and get the same quality level as performing those operations in Lightroom / ACR.
Nice article, this definitely seems like a logical way to go for efficient negative processing. I see you posted the one color example at the end, but your workflow didn’t talk much about processing of color negatives in Lightroom. Is it just a matter of doing selective curve adjustments on each color channel like you would in Photoshop with a TIFF scanned negative?
The holy grail would be to have presets for each standard film emulsion. I suppose this is something that one would do as they process each roll/batch, and save as a base reference for future images.
Ironically, preset makers like VSCO go to great lengths to release hundreds of custom presets to make standard digital photographs look like they were processed with various analog film emulsions; I’d like to see the opposite — someone produce a relatively reliable standard set of presets for negative processing of various film emulsions.
Nice photos too… those Mamiya shots are lovely.
Thanks for your comment and kind words!
Yes, all you said about processing negatives makes lots of sense and I would try doing it exactly this way. Obviously this is way more difficult with color negatives because of a) complexity and different characteristic / color response of emulsion layers b) limited Lightroom controls (let’s face it… it was not designed for complex “arbitrary” color manipulations) and c) the fact that it is way more difficult for us to think about color than about just luminance.
I have had experiences with scanning and processing color negatives in other software or Photoshop and it was never easy… Also it is difficult “artistically” – balance between correcting the color cast, white balance and custom curve reponse of a given film. You want to preserve some of film own “feel”, (this is one of reasons of shooting film and staying analog after all) but how much? In perfect world and perfect software I could imagine separate knobs for correcting the WB, color cast and undoing the film characteristic.
But I think that software that you mention exists – I Silverfast in pro versions has built in database of various films and can correct them http://www.silverfast.com/highlights/negafix/en.html – but obviously this is commercial software, not a “garage”/DIY technique like the one I described…
Cheers!
Hi!! I’m a new user of Lightroom – in fact it is the first time I ran the program – and I installed it just to work with a series of negatives I developed by myself and LR seems more practical than Photoshop. Your article helped me A LOT, so I want to say a big THANK YOU! Cheers! (sorry for bad English, I’m from Brazil).